My little brother is getting married soon and since I love weddings, and love to be involved in them I offered to help out in any way that I could. I have also had fun sharing a bunch of ideas with them.(probably to the point that Luke and his fiance cringe when they see me coming- I hope not!) There are so many fun ideas for weddings anymore that it would be a shame not to use a few of them.
Luke and MollyBea are planning a fun, bright and colorful outdoor wedding. They are using a few of my ideas and I do get to help out a bit. I am excited to see the finished result when the wedding day arrives. I have been working on projects for that recently but I dont' think I will share those just yet. However I thought I would share an idea that I shared with them that I think they have decided not to use.
It is pinwheel cookies! MollyBea likes pinwheels so I thought they would make a fun addition to their reception and I even volunteered my older sister to make them for them (grin). I think they are doing something else but maybe you would like to make some fun pinwheel cookies at your house. Just in case you would here is how:
First you need to mix up the dough:
Here is the recipe:
- 1/2 cup butter
- 1 cup sugar
- 1 egg
- 1 teaspoon vanilla
- 2 cups flour
- 1 teaspoon baking powder
Step 4. On a lightly floured surface, roll dough into a 14 x 10 inch rectangle.
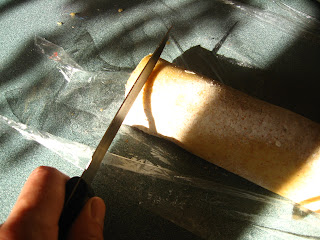
Step 5. Spread on Jam. I used raspberry but you could use any type you desire. You can also use a date filling (which is the way my aunt makes pinwheel cookies and they are delicious!) or chocolate sauce or whatever your heart desires.Step 6. Decide what sort of pinwheel cookies you want (or if you want to make both styles like I did) You can make round ones or the ones that really look like little pinwheels that you can blow. If you want round ones you roll the dough up (with the jam on it) and wrap it in plastic wrap and but it in the fridge for 3 hours or more. You can also stick it in the freezer to pull out at a later date. If you want to make the other type then you need to cut the dough into squares (around 2 1/2 inches wide).
For the square type you then cut slits as shown above. So it looks like you have 4 triangles in each square.
Then take one corner from each triangle and pull it to the middle. Then they are ready to bake.
For the round type simply take the now cold and hard roll and slice into 1/4 inch rounds.
Place on cookie sheet and bake at 375 degrees for 10-12 minutes.
They make a cute and yummy cookie!
I hope you enjoy them!


2 comments:
Those look so good and pretty easy. Thanks for sharing!
Oh my God this looks so good and i`m sure that it is delicious too. I think that this is a easy recipe so i will give it a try, thanks a lot for sharing.
Post a Comment