Debora graduated from college this year and she invited us to come celebrate with her. The kids weren't able to go but I was able to make it work. Wendy, her first host mom in Bemidji also was able to go. So we were able to travel together part of the way and enjoy being there at the same time as well. We had a marvelous time and I am excited to share the experience with you!

Wendy and I in the Fargo airport. It only takes us a couple hours to drive there, the airport is so easy to navigate and it was cheaper than our normal of going to Minneapolis. A win-win! We drove out of Bemidji at 9 am on Thursday, January 25th. From Fargo we flew to Chicago. After that I was supposed to fly to Washington DC and Wendy was going straight to Brazil (Sao Paulo). I had gotten a text saying my flight to DC was delayed which was a little concerning because there was not a huge layover in DC. United Airlines evidently decided it wasn't going to work either and they automatically switched me (and sent me a text to let me know) to flying straight to Sao Paulo from Chicago on the same flight as Wendy. That was really nice. The flight was quite crowded and I got on to find somebody already in the seat they had assigned to me. The steward was very helpful and the Brazilian family that was in the same space were very friendly too. There was an empty seat in the area that the steward thought was somebody else's but they never showed up so all worked out fine. It was an overnight flight. Not very restful but delicious food was served (Butter Chicken being the supper meal). I visited with the Brazilian family some throughout the flight and tried watching movies in Portuguese to improve my skills. When we landed the man tells me "Be careful!! Don't go out alone at night." Thanks! I had already read a bunch of safety warnings on the US State Department website. This made me feel a tad bit nervous.
We landed at Sao Paulo nice and early in the morning and then had plenty of time to wander around as Wendy's next flight wasn't until around 2 pm and mine wasn't 'til evening.
A new thing that I saw here that I haven't seen at an airport before was buffets. This is a common restaurant style in Brazil but you pay by the weight not just a meal price. We ate lunch at one and it was quite good and very reasonably priced.
That afternoon I had time for some reading and really enjoyed the book "Don't Give Up" by Kyle Idleman. I really appreciated the quote above and it ended up being very timely as later that day I would deal with fear, weakness and loneliness.
When I got off the airplane in Sao Paulo I had to collect my checked bag and then had to check it again in the airport. I got to the place way earlier than they want people to come to check into your flight and so they didn't want to take my bag. They (with their very limited English - and I was no help because I didn't know any useful Portuguese other than to ask if they spoke English and tell them I didn't speak Portuguese) kept sending me back and forth between 2 different spots (one upstairs and one down and then down some halls) until finally somebody knew English well enough to tell me that I just needed to wait. Eventually I got my bag checked again and could go find my gate. So I did and sat there happily reading until it was time to board and then I discovered that they had changed the gate at the last minute. So now about 3 of us or so were speed walking down the hallway to find the new gate. We got to the right area and it wasn't there. Then I discovered a stairs and it led to it. Yay! Everybody is waiting including the pilots and flight attendants. And then some big announcement is made which I don't understand a word of. Thankfully a lady nearby has been living in Chicago the last 25 years and so speaks English very well and we had already started chatting and so she translates. The flight was cancelled. Oh boy! What next??? I discover another family of English speakers (they also are Brazilians that live in the US). They said that Latam (the airline we are now flying) always does this sort of thing. They are going to rent a car and go that way instead. They are going to a Graduation party on Sunday in a town 15 minutes from where Debora lives. I wonder if I should try to get a ride with them. Meanwhile Maryannie (the very nice lady from Chicago) tells me to stick with her, we'll get it figured out. So we head to an area where we stand in line, meanwhile she gets a text saying they have put her on a later flight that night. We find out we are in the wrong line. So she takes me to another much longer line and tells me good luck. :-) I have been traveling 30 plus hours by now and I am exhausted.
In line I was struggling to keep my composure. I had found very few airline people that spoke much English at all earlier and here we have this big issue to deal with and we have a huge language gap. Then a man just ahead of me in line says in English "Do you need help?" Yes, yes, I think I probably will. We ended up having a great conversation for the hour or so of waiting. He was embarrassed to speak in English because he didn't think he was very good but he did just fine and I was so very, very grateful. His name was Gabriel and I thought that was very fitting as he was my angel of mercy at the moment. He took care of his issues with getting a new flight and then had me come and translated everything for me and had the Airline worker even lead me out to the Taxi (because they gave me a flight the next morning so I had to take a taxi and go to a hotel) and explain things to the taxi driver. And then off I went alone in the night into a big city. Just what I had been told not to do. :-) Thankfully God was with me every step of the way!
The taxi brought me to a nice looking hotel (a Comfort Inn, I believe) it was right next to a Hampton Inn so it felt like I was back in the states. In the process of taking my bags in the hotel I stuck my voucher for my hotel stay and the voucher for a taxi the next morning in a pocket. I had 4 pockets on my jeans and 5 pockets in my jacket and when I got ready to talk to the person at the hotel I completely forgot which pocket I had put them in. I was completely exhausted and a bit of an emotional mess and so I was frantically looking through my pockets (except not the one I had put them in) and my bags and the poor hotel people didn't know how to help me. Thankfully I did find them after several minutes of searching and most of the hotel people spoke English fairly well. What a huge blessing!!! They told me that the Airline also gave me money for food and that there was a buffet open still (it was around 10 pm) and also I could get breakfast delivered to my door before I left in the morning. How lovely! They helped me to arrange to have a taxi to pick me up at 4:30 the next morning. I questioned needing to go that early for an 8 am flight but the people at the airport told me I should be there by 5 so I did. I ended up having plenty of extra time but better safe than sorry.
My adventure for the night wasn't quite over. I went up to the room and after getting in the lights didn't turn on. Then I noticed that like the hotel we stayed at in Dublin, Ireland (which had been run by Brazilians) there was a place I could slip my room key in by the light switch. So I did that and Tada! the lights work. So I figured I had it activated. I took the key back out and headed into the bathroom. I closed the sliding door and sat down and the lights went off. So then I am taking care of business in complete darkness, washing my hands and finding the door to get it opened again and then finding my room key in the dark. I get the lights on again but I am not feeling all that bright at this point - it has been a couple of days since I have slept much at all and I have also been pretty emotional - and I take the room key out again. And what do you know after a minute or so the lights go off again. I try to call the front desk with the phone to figure out the problem but I can't get the phone to work either. So I head downstairs again. They figure I have a bad room key so they give me a new one. They also tell me how to use the phone. The new room key of course works the same way and I have the same problem again. So I call them and they figure they better give me a different a room but thankfully as I talk to them it suddenly clicks that I need to leave the room key in the slot and sure enough that works and I don't have any more issues with lights. Thank you, God!
I hadn't eaten supper because I was supposed to be flying instead. I wasn't feeling that hungry anyway but decide I had better make the most of this bonus adventure so I head down to arrange breakfast delivery and check out the buffet. Thankfully they said it was fine to bring stuff up to my room as I was still feeling a bit emotional and super tired and didn't feel like being out in public anymore.
The fresh fruit totally hit the spot. I had to try the Brazilian beef and it was quite good. The Pujim (kind of like flan) was quite good as well and I loved the Coconut Popsicle.
The room was quite nice and the shower felt so very good! I didn't sleep all that well as I was nervous about not waking up on time (fairly normal problem for me when I have to get up super early for a trip). I did get some sleep and felt much better the next day.
On Saturday morning Debora and her dad, Alair, picked me up from the airport in Uberlandia. We then had around a 3 hour drive to Debora's town of Legoa Formosa. It was very fun to see the landscape as we drove along. There was quite a lot of hills and then quite a lot of farmland as well. We mostly saw either corn or coffee growing. There were other things too but I don't remember what other than some quick growing trees that are used for lumber.
We stopped at a very nice truck stop to eat lunch. This was also a buffet and had a very nice looking dining area. The food was very good.
Upon arriving at Debora's home I got to meet her mom, Helen (pronounced Ellen) and Grandma, Lourdes (pronounced Lou-jus). Debora speaks English very well but her family only knows a very little bit and Wendy and I only know a very little bit of Portuguese so Debora had to do a lot of translating but that worked out pretty well.
I felt very warmly welcomed - I was greeted with hugs and a room all ready for me with a picture of the kids and I framed and in the room and a card and gifts on the bed. It was very sweet.
We had an afternoon snack which included a really yummy dessert made from the fruit Maracuja, condensed milk and cream and then Lourdes left and we decided to go on a walk around their neighborhood.
Across from their house and also down just a bit there were some empty lots that were almost completely planted in okra.
Their house is near this pretty pond. It is a nature reserve so there is a fence around the pond and surrounding woods so you can't walk in the natural area just look at it.
We saw a couple of small monkeys on our walk. They were pretty cute.
A Passion Fruit flower. We also saw the fruit.
That evening we had pamonha for supper (they eat suppers late but have a "2nd Breakfast" in the afternoon so we aren't starving) along with a lot of other food. In general they had a lot of variety at all of their meals. The pamonha they ordered and then they were delivered to them. They were made out of corn and had cheese in the middle. There were two varieties one was a little sweet and the other was savory. Before supper Debora's step-dad Roberto (pronounced Ho-bear-toe) came home and I got to meet him. Her step-brother Douglass (pronounced Dough-gliss) came over to join us for supper. It was really fun to get to visit with all of them. Debora had to translate a lot but we had fun trying to learn words in the other language as well.

On Sunday was the graduation party. It started around 11 am. It was right outside the Catholic church which was in a parklike setting. It was across the street from the restaurant that we got food from. Debora and her family had got truffles (or Bonbons) elsewhere and they made a very pretty table. The gift boxes had more bonbons in them that were given to us. The cakes were very good. They reminded me in flavor of strawberry shortcake. They had fruit in them and a filling that was whipped cream like.
Debora, Wendy and I.
Debora with Helen, Roberto, Douglas, Taffarel, Mara and Florence.
Debora with Alair, Rosirene and Estefany.
In the shade under some large trees it was a lovely place to have a party. Helen had decorated the tables with pictures and garlands.
We went to the restaurant across the street to get our food. It was a very large buffet with lots of delicious food. Again it was weighed and then they kept track of everybody from the party so Debora's family could all pay for it at one time. (Sorry, Wendy, for the blurry picture!)
When the restaurant owners found out that Wendy and I from the US were eating at their establishment they wanted to meet us and asked it they could get their picture with us to use on social media. We said, "sure"! The above picture is Debora, her parents, Wendy, the Restaurant owners and I. Here are the restaurant's
Facebook site and
Instagram but it doesn't look like we are pictured there yet. :-)
Brazilians are into having professional pictures taken so they had a photographer hired for the party. The above picture is Debora and her "moms" (though missing her step-mom). It is her grandma, mom and then her American moms.
A group party picture.
This was a fun group to hang out with at the party. They tried to include us in the conversation (even with the language barrier) as much as possible. We shared many laughs.
While we were having the graduation party there was another group also there having a birthday party. There is a party service that you can hire in Brazil where this man with his truck that has a loud speaker comes and he will play music (maybe sing sometimes too?), read a message to the guest of honor that has been provided by the person that hires him and then also put off some fireworks. When we saw that truck pull up Debora explained to Wendy and I what it was and she was really hoping it was for the Birthday girl rather than for her. It was, however as soon as they got done hiring the birthday girl then Debora's parents arranged for her to be honored as well. So she is standing up there while the fireworks are going off and while messages were read to her. She was very touched by the messages (I don't know what they said because they were of course in Portuguese).
The candies at the party looked so pretty with their little papers around them. They were very yummy too.
The church building that the party was next to. This is also were we went to church that evening.
Debora and her family are Catholic. The party was on a Sunday, late morning so with getting ready for that we didn't go to church then but Debora, Wendy and I went in the evening. I have only ever been to a Catholic funeral before so it was interesting to attend a regular service. It was very different than the church services that I am used to.
I was impressed with how many people attended. The building was pretty packed and it wasn't a small building. (the picture above was taken after most people had left). I really enjoyed the music. They had 3 guitars that played and a youth choir that sang but others also sang along. It was really pretty and a very different style than I have heard in the U.S.
It is always fun to see pretty architecture.
That evening after we got home from church we had supper. Around that time Roberto got a call from a friend of his saying that they Mayor wanted to meet Wendy and I. Roberto wondered if that would be all right. Of course! They wanted the experience of meeting Americans but we wanted to experience of really seeing Brazil so this was great!
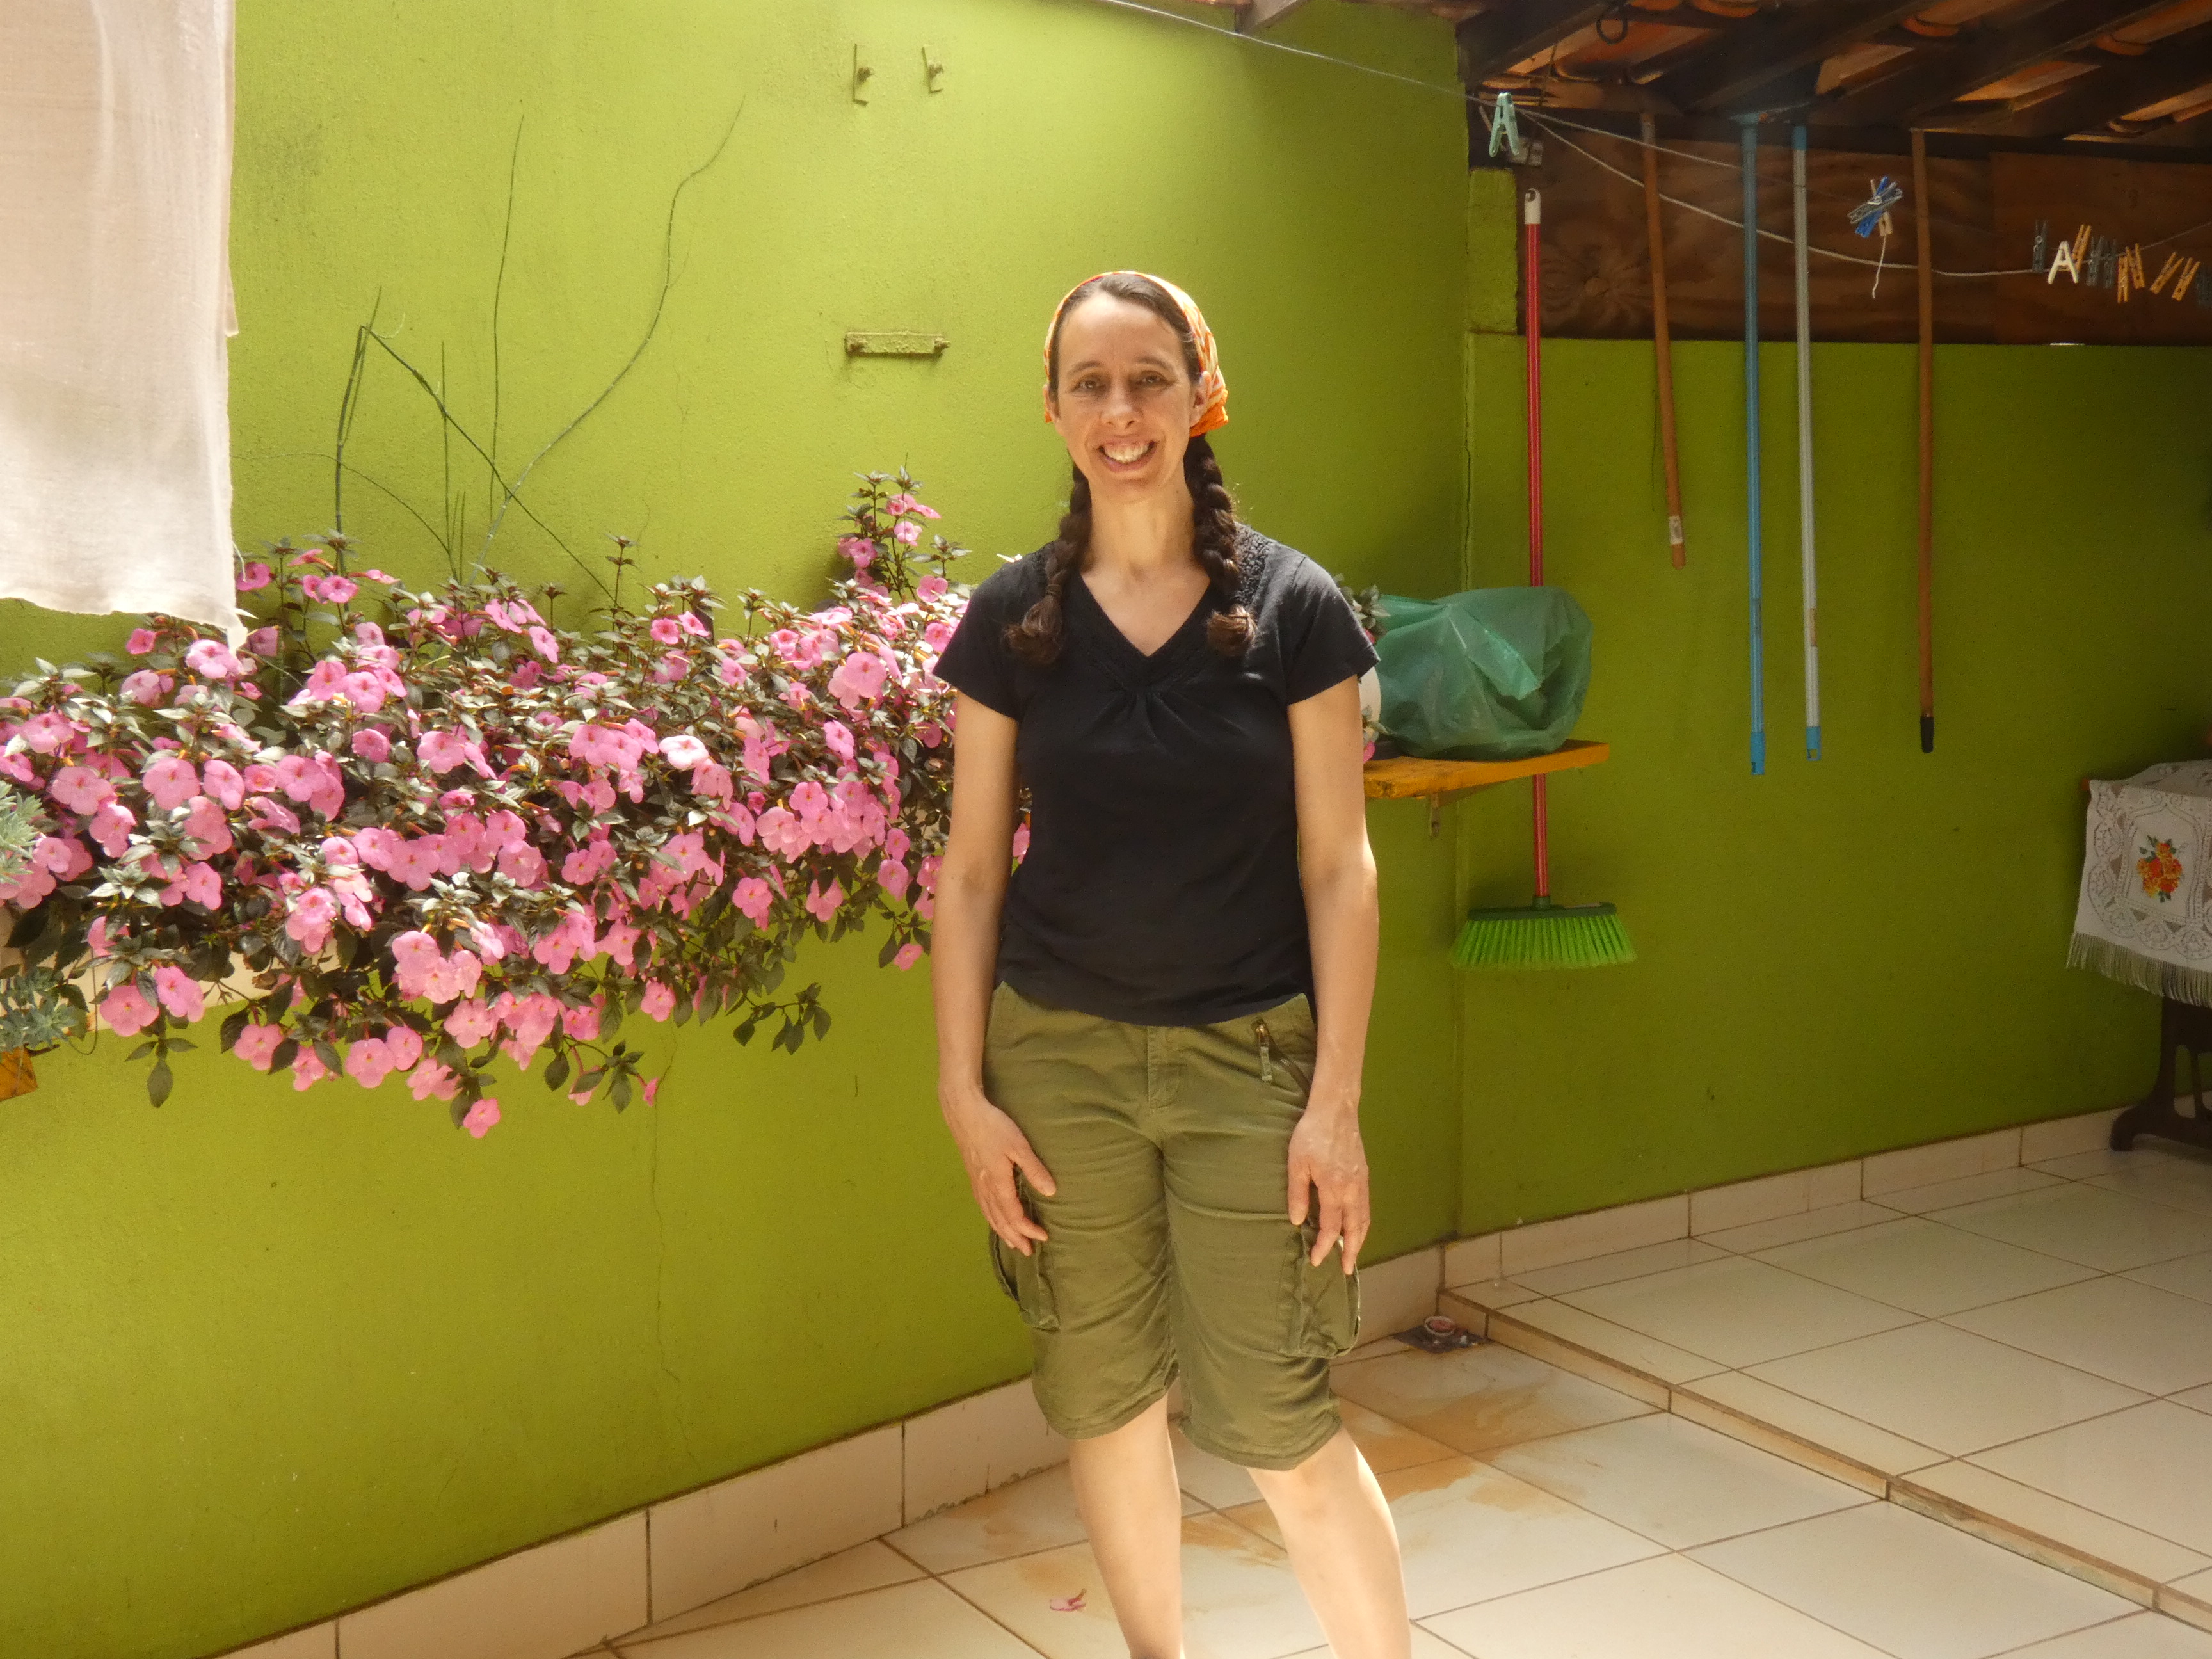
Some beautiful flowers in Helen's little garden area.
Monday morning we went to city hall. Or I think they called it the Palace of Roses or something like that. One of their family friends works there and is the brother of the Mayor (we had met him at the party) and so he showed us around.
When we got up to the Mayor's office we were a little surprised to find it set up like a press conference with a videographer and everything. Wendy and I sat on either side of the mayor (that is his brother on the other side of Wendy) and then Debora and her parents were there too. Debora had to do a lot of translating but we did have a really fun visit for around an hour. We talked politics and just compared life and laws and government from country to country.
And of course we took pictures. :-)
That afternoon Debora, Wendy and I went out shopping. I really enjoyed all the little shops. They have quite a selection in Legoa Formosa. I love all the little corner grocery stores. I ended up buying quite a few snacks to take home as well as various other small gift items. In general things are cheaper there than here (at least considering the value of the dollar to the real).

I had thought it would be fun to go to a florist while we were there. They have quite a few florists. The one we went to had a wonderful plant selection but very few fresh flowers (it took us a bit to get it across that was what I really hoped to see). I am guessing every florist is different.
I thought these braided plants were quite fun.
When we did finally figure out about the fresh flowers they let us come in there back room. There fresh flower selection was in a big chest freezer which they kept cool with frozen water bottles.
These are the sweet ladies that helped us. We bought a sunflower and a rose with some greens and filler to take to Helen.
They shared a Jabuticaba fruit with us. It was good.
Then Debora treated us to locally made icecream. I had a toasted coconut flavor that was delicious!
It was a nice ice-cream shop. I guess they have several in their town.
That afternoon we tried Romeo and Juliette. It is homemade cheese from their farm pared together with a sliceable jelly made from some fruit. It was really good.
Helen did all the cooking and washing of dishes (Wendy and I tried to help at times but were told that we were guests and that wasn't for us to do so we tried to be good). She always made big meals. This evening we decided to watch and take notes - so she gave us a little "cooking show".
She cooked okra for us quite a few times and the ways she makes it is really delicious.
I can't remember what this is but it was good.
Steak (or Bife) - again, very tasty!
The flowers from the florist after we put them in a vase.
On Tuesday we got up in fairly good time and Roberto took us to a bakery to have some fresh baked goods for breakfast. It is the bakery to whom they sell the cheese they make on their farm.
The things we tried were very good. They use quite a bit of cheese in their bread and I like that.
Pao De Queijo is a cheese bread that Debora introduced to us when she lived with us and I have enjoyed making since. It was fun to get to eat it regularly in Brazil.
Our breakfast
After breakfast Roberto took us to the Recycling (they deal with all of the towns trash and recycling) center which he is in charge of. It didn't smell as bad as the transfer station here. It may be helpful that it wasn't in a building and they also had some vulture sort of birds all over that were probably eating most all of the food scraps.
Roberto called all the workers over to meet us. This is most of them pictured. We had a little Q & A with them which Debora again got to translate for.
After that Debora's dad, Alair, came and picked us up to take us to Patos De Minas a larger town (153,000) 20 minutes away that he lives in.
We first stopped at the new airport they had there. So maybe next time if we visit again we can fly to there instead of Uberlandia. I did just check however and it said there were no flights available so at this point I am guessing they don't have much activity there. There was only one person working there (that we could see) when we went to look at it.
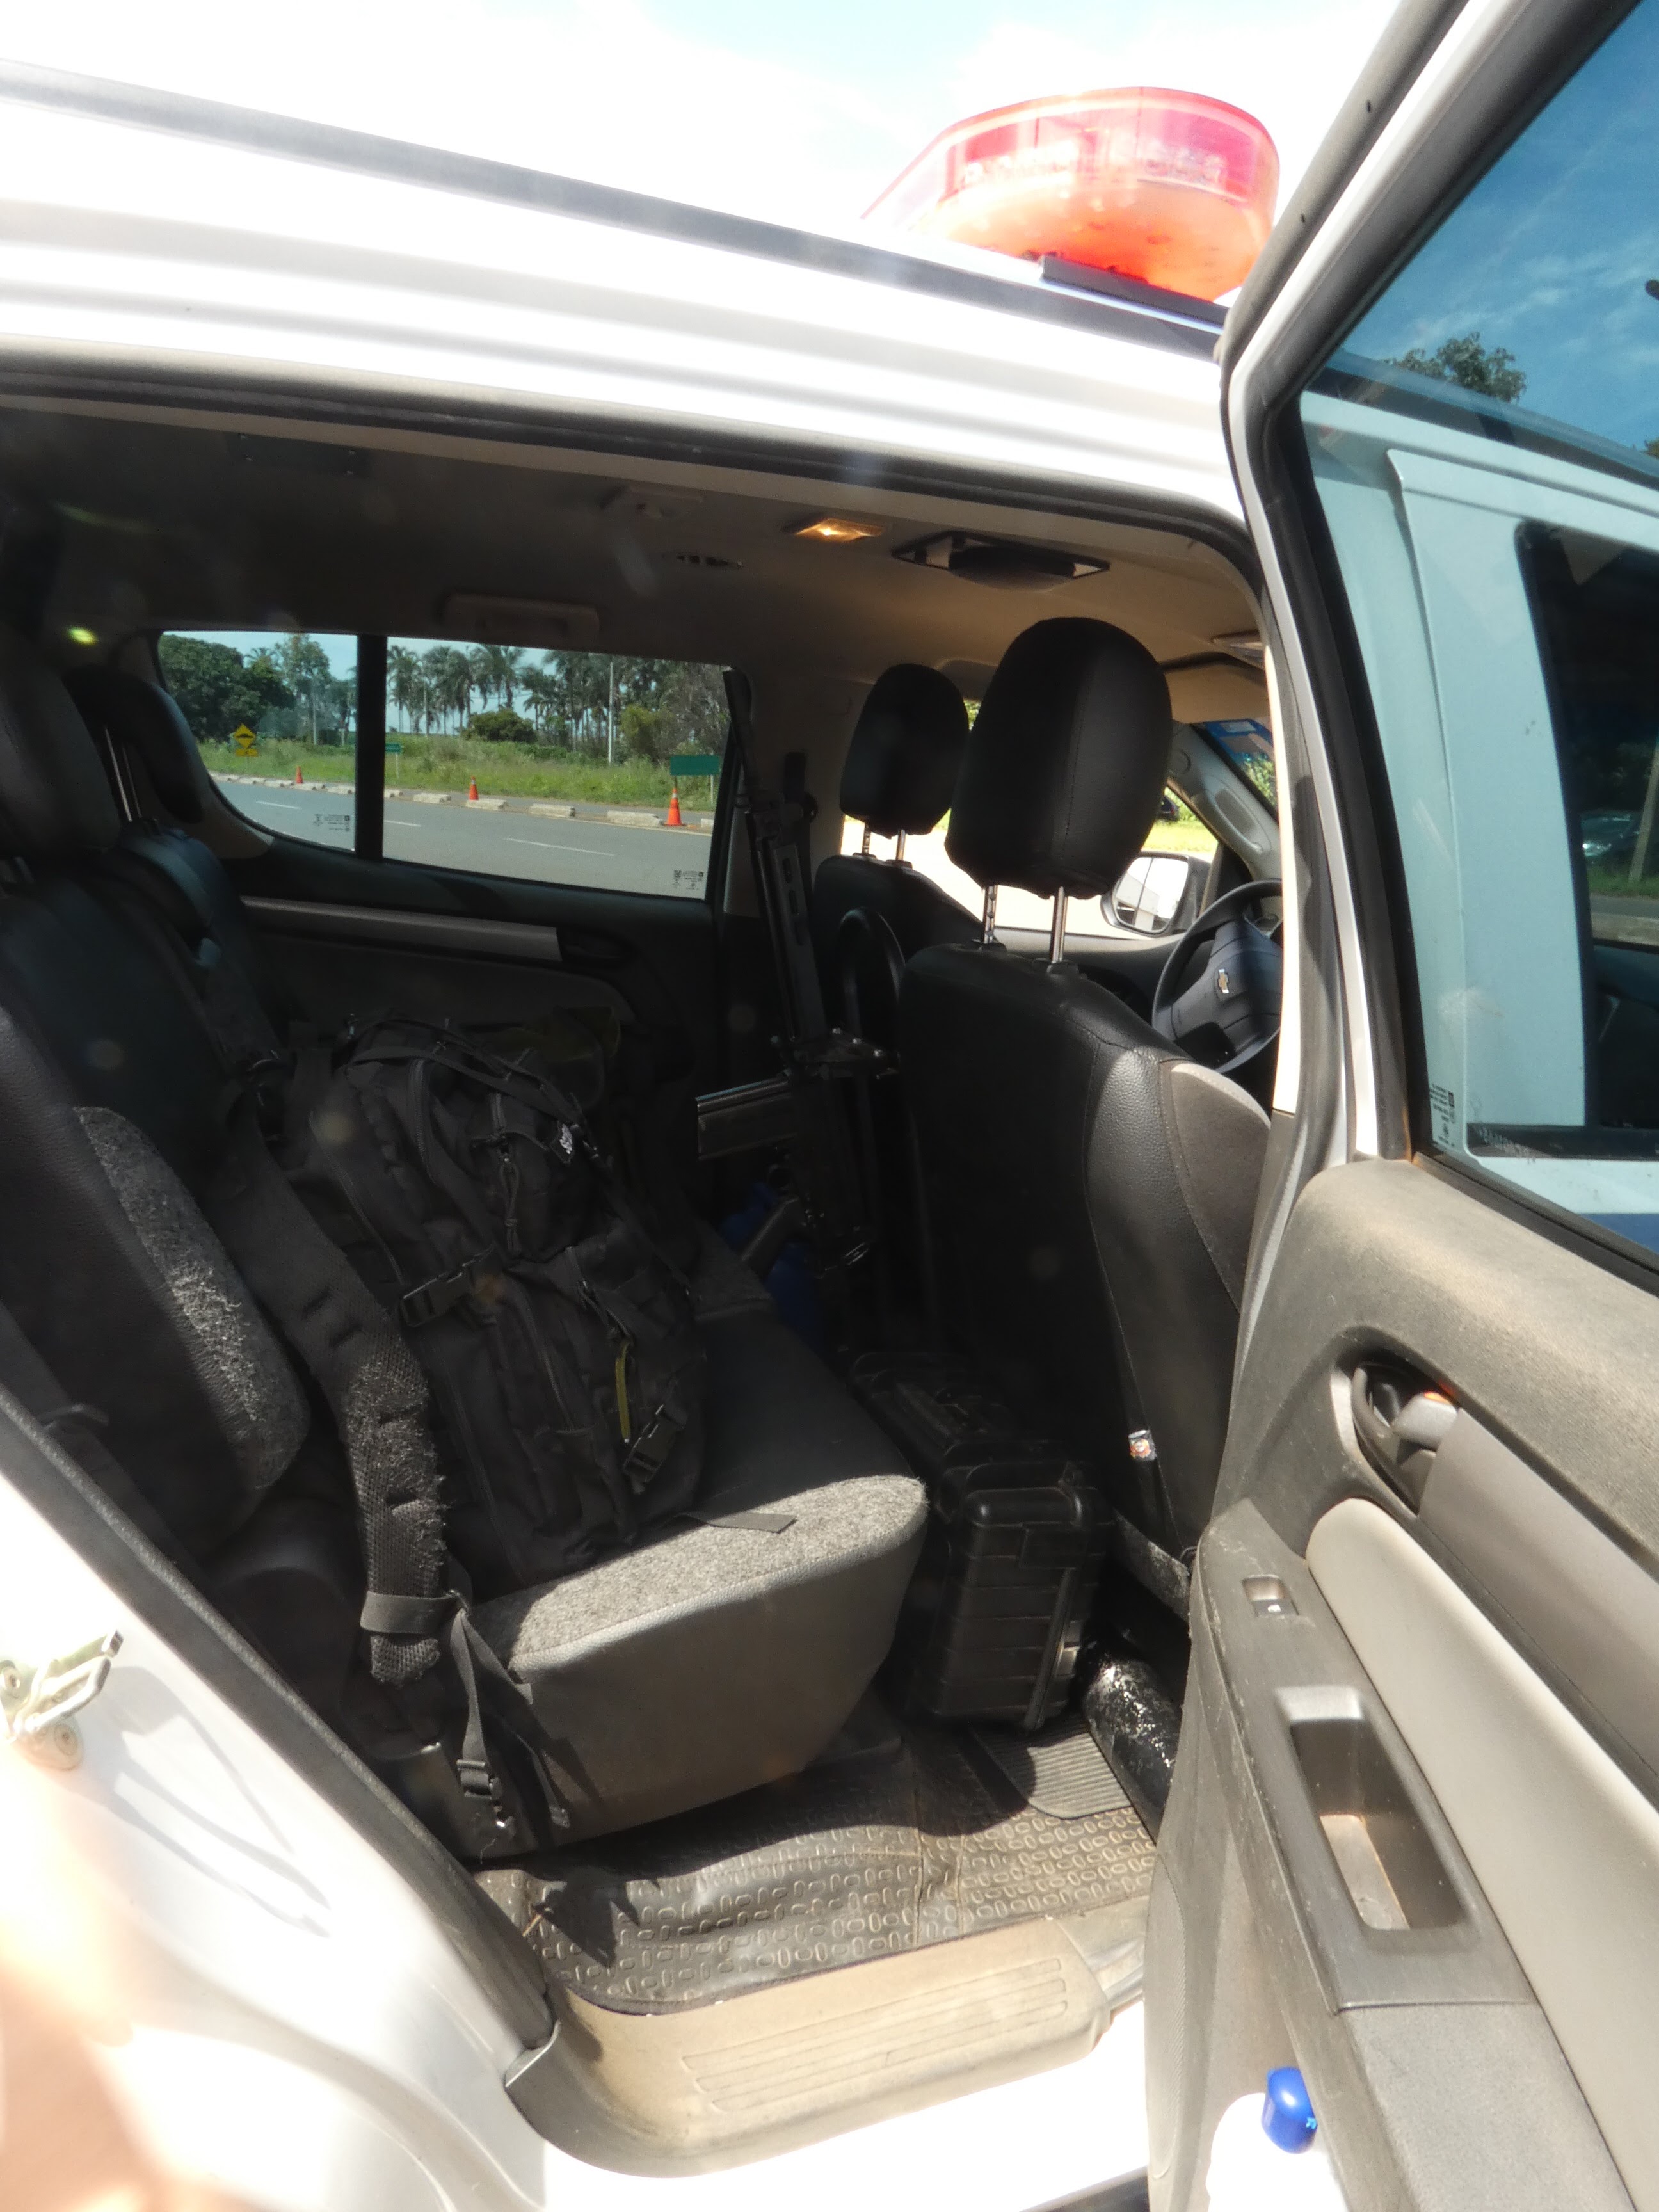
Then we stopped at the Police Station that Alair works at. His wife used to work there as well but is retired. He has also retired but then has gone back.
Here we are with Alair and the team he works with and the commander (if I understood correctly). They were super friendly and showed us all over and enjoyed hearing us speak in English, thinking it sounded really neat.
There were also people dressed in green uniforms which were more like DNR.
I had thought it would be fun to see if they would let us sit in the back of the police car and get a picture there. When we were looking at the police care I noticed however that they had rifles in the back seat. So I questioned them as to where any prisoners would sit.
I guess they go back here. They must not use it that often as it had stuff in it. I decided not to ask if I could get a picture in here.
We then went and looked around a bit at a park.
I thought it fitting that we saw a duck there as Patos means ducks.
Debora and Alair
Alair took us to a restaurant in the mall to have lunch. Rosirene and Estefany met us there. It was a again a buffet and was quite good.
Then we went to a different place next to the food court and got some ice-cream. We tried a variety made which a Brazilian fruit. It was very good. After that Alair took us around to different places as we looked for magnets and other gifts to buy to bring back to the states. I found some local coffee and various other things.
Part of the things we saw in Patos De Minas. We went inside the church building in the background of this picture. It was pretty fancy.
I don't know what this flower is but it is beautiful.
Then we went back to Alair and Rosirene's home. This is where Alair makes his Brazilian BBQ.
They have a courtyard in their home were they do have a little bit of yard and some other plants. Alair was showing us his Mountain Bike which he enjoys riding.

Then they fed us an afternoon snack.
In front of their home. Most houses in Brazil seem to be hooked to the houses next to them.
Then Alair took us back to Legoa Formosa.
That evening we went to the Rotary Club meeting. This was the club that sponsored (they don't pay for her to come but they organize things) Debora coming as an exchange student. They asked Debora, Wendy and I to say something.
One Rotarian had written a book about his experience with Rotary and he gave Wendy and I each a copy. It is in Portuguese so I haven't read it yet however it is my goal to get good enough at Portuguese that I can read it. In this picture is also the president of this Rotary club and his wife.
We started the meeting at 8 pm, I believe and then after the meeting they had a supper for all of us. It was stroganoff which was quite good. They also had rapadurra which I really liked. I had purchased some to bring home as well but it wasn't soft like what they served here.
When I found out that Roberto and Helen milked cows each day I was excited to get to try the milk. I love to get farm fresh raw milk when I can so this was exciting to me to get to try it in another country. They don't actually often bring it home very often for their own consumption (they make it into cheese and sell it) but when they heard that I wanted to try it they brought it home and Helen pasteurized it on the stove. I am fine with that but explained that I would love to try it raw. I was thinking raw and refrigerated but Roberto was excited that I want to try it like he enjoys it - straight from the cow.
 |
| At Miguel and Lourdes' place |
So Wednesday found us going first to Debora's Grandparents for lunch and then out to the farm. Actually before that we went looking to find some pretty tile because Wendy had enjoyed seeing all the fun tile in and out of people's home and thought it would be fun to get some to make coasters from. We found a pretty piece that was too big but Roberto found a friend that did tile work and he cut it up for us.
Lourdes made Pudim which is one of her specialtys. We had it as a snack before lunch and it was delicious! It is a cheese cake of sorts. She gave me a recipe but my first attempt didn't quite turn out. I will try again though I don't have cheese just like theirs to use. She and Helen worked together to make a huge dinner for us which was delicious. At snack time she also made us an avocado smoothie from a huge (like 4 times as big as what I normally find at the store) avocado, milk and sugar. It was lukewarm (as nothing was frozen), thick and creamy and incredibly delicious. That is something Megan and I have been recreating many times since then (though I have been using honey instead of sugar) and we love it.
Wendy, Lourdes, Miguel and I. The houses in Brazil were quite a bit different than in America. This was an indoor/outdoor section to their home. There were walls and a tile floor (that was slanted and could drain) in this section but no roof so the rain could come in. It was connected to the kitchen and dining area with no walls in between but those areas did have a roof. They had many pretty plants in this area.
This is another picture that kind of shows that area a little better.
This is their well (or cistern???) that is in that area. Though there was a roof over it.
Helen and Lourdes in the kitchen busily preparing our meal.
We had fried pork (I think, it may have been chicken), potato salad, rice and beans and various vegetables.
We got to visiting with Miguel about his growing up and how they made everything then. He showed us this blanket that his mother had woven (possibly with his help). It was very neat.
Then they showed us a ceramic water filter (that was probably made by hand) that they used to use regularly to have pure drinking water. I really loved this experience of being able to learn about another culture and history first hand like this. It was so much fun!
One of the neat plants they have at their place.
Then we headed out to the farm. We rode in their cute "slug" bug. It is a small car so Roberto said that I should sit up front since I am tall and these sweet ladies sat in the back. Roberto went back to pick up Miguel and Helen after dropping us off. I don't really think of myself as tall since compared to my kids and much of my family I am not but I see that I was taller than many women there.
We had a lot of laughs as we traveled.
Lourdges showed us around the garden. They are able to grow lots of fruits and vegetables.
This is Gojaba fruit. It grew very plentifully on their little farm. It was crisp and yummy.
Another garden picture.
Me in front of the cow pen.
Roberto is getting silage that they made for the cows.
They do generally use a milking machine to milk around 5 cows. They tied their back legs and tail together before milking.
Roberto did milk them by hand to get a glass of milk for me.
I got to try too.
They were all waiting to watch me drink it. That was a first to have it straight from the cow. Warm frothy milk is different but I think I could get used to it.
Roberto likes it with a little coffee (presweetened) in it and so they had brought a thermos full for me to try it that way. I am not into coffee but I did like that. It wasn't heavy coffee but made the milk seem like it should be warm.
They had quite a few cute calves.
After milking we got to help with cheese making. They immediately turn all of the milk into cheese. This special cheese board I think was made out of slate.
They sell their cheese to a local bakery that makes cheese bread and other things with it.
When we took Lourdes and Miguel back I had noticed some crocheted rugs and so they took us over to see a neighbor who did a lot of crocheted. Helen and Debora ended up getting a rug for both Wendy and I. They are a nice, lightweight and washable rug for a bathroom or beside a bed.

Then we went over to Roberto and Helen's farm that belongs to them (earlier it was Miguel and Lourdes' farm but Roberto and Helen have the cows there). Roberto's son Douglas lived at this residence.
There they had a cool table made from a huge slice of wood.
They had pigs at this farm.
And mulberries!
They also had a horse there.
While we were out and about we collected some flowers and leaves and decided to do a flower pounding project.
We had a lot of fun with it!
I don't remember now which day it was but one afternoon Debora was busy for a bit and Wendy, Roberto, Helen and I had an opportunity to visit without having a translator available to us. There really was a bit language gap as two of us really didn't know much Portuguese and two didn't know much English. We had all been trying to learn in our time together but we were still very new at it. But we wanted to visit. So we started off. Roberto was the best at telling a story and as he went Wendy and I would have this dialogue going on trying to figure out what he was saying. We'd recognize a word or two and try to figure out the story from there. He would get dramatic, make sound effects, pantomine a little and Helen would add in an English word now and then if she knew it. We really had a wonderful time together and I think we got the jest of a couple different stories. It really made me want to put myself in other situations like that again (with patient people like that!) as it was super helpful in learning Portuguese and just really fun for stretching my brain as well.

That evening Debora took Wendy and I out to eat for pizza. It was fun!
This is their bonus room where they spend a lot of their time. They have a huge table in this room.
They also have a big table in this room. They had it made for them and it was beautiful. This was more like the formal dining room (we never actually ate there).
Debora and Helen kept updating this whiteboard while I was there with Bible verses and sayings often in both English and Portuguese. This was Helen's message as I was leaving. "Ate Logo" means "See you later".

Outside their home the morning I left. I was welcomed here so very warmly, it was hard to leave.
We left at 7 am but on our way out of town Roberto stopped to see if their museum and library were open and we got a special tour.
We also got a picture in front of the lake.
We stopped at a pretty river on our way to the airport in Uberlandia.
This filling station bathroom totally impressed me! It was so big and fancy.
The trip home went pretty well. I was flying into a different airport in Sao Paulo so I was a little nervous about that but Debora talked to somebody at the airport with me and it seemed like there would be a bus (I thought free shuttle but I must have misunderstood) available to go from one to another. On the flight I got acquainted with a German man and his little girl (who was part Brazilian and spoke mostly Portuguese). When we got to Sao Paulo we kind of worked together to find where we needed to go and discovered that there was no free shuttle. A taxi driver convinced us that for three of us he would be just as cheap and much faster. It still took around 2 hours to get across the city. I had pretty much no Brazilian money left and hoped to pay with credit card but the German man also had no reals so he paid with credit card and then was willing to take American dollars from me. I was rethinking me life choices for a bit and wondering what I had gotten myself into but it all ended up working out just fine for which I am very grateful.
All in all it was such a wonderful trip. As I finish writing this many months later I start feeling a little "homesick" for Brazil and Debora and her family. I truly hope I can go back someday. But for now I have other adventures to go on. Megan is currently over in Italy and I am looking forward to going to visit her in November. The ticket has been purchased now we are trying to work out all the details.


