Monday, September 23, 2013

Soapmaking! {Without expensive oils}


I have wanted to learn how to make soap for quite a number of years. There were actually quite a few reasons that I wanted to make my own soap. They were:
  1. I always enjoy being able to make something instead of buying it if I can.
  2. Whenever I have tried homemade soap it has been so much nicer than anything that I can buy at the store.
  3. I prefer to use bar soap over liquid soap so that I can avoid the Sodium Laurel Sulfate.
  4. If I did it the old fashioned way, I could use ingredients that were basically free and extra from meat processing. So I could save money with soap making too.
 In my quest to make soap however I started to feel a little discouraged with learning how to actually make old fashioned soap. Soap making is a popular hobby now but pretty much all the information I could find on it, whether on blogs or in books, was using expensive oils like coconut oil, cocoa butter, almond oil and so forth. Not that I have any problem with soap made out of those oils - I have tried some that others have made and I really, really like them. My problem was with the expense of it and also because one of the reasons I wanted to make soap was so that we could cross one more thing off the list of things that I needed to buy.
 
   I did however go over to a friends a couple of times while she was making soap (from purchased oils) and watched and helped her with that so I could get the general idea and then I found out another friend made soap and she made soap with things that I could easily get and which where basically free to me. Yea!!! She shared her recipe with me which I ended up tweaking slightly (after doing quite a bit of research) and so I will share that with you.
 
 Goat Milk, Peppermint and Oatmeal Soap
~12 oz. lye flakes/powder (I bought mine from Amazon - it was labeled as a drain opener)
~ 3 pints goats milk (most of this should be frozen in ice cube trays or something so it can be made into a frozen slush)
~5 1/2 pounds of Animal fat/tallow (I used beef and goat tallow) This should be clarified and lukewarm (around 100 degrees)
~ 4 heaping teaspoons borax (optional)
~ 2 cups oatmeal either whole or finely ground (optional)
~ 2 cups dried peppermint leaves (optional)
~ Peppermint oil (optional)
 
 
 1. Weigh and melt your fat. I used Ken's old postal scale. Someday I suppose it might make sense to buy a digital scale but right now I am trying to avoid buying anything. It worked!


 2. Put your goat's milk (frozen and unfrozen) together in a pan and try to make into a slush. I should have done this a little more before I added the lye. The purpose of having the milk really cold is because the lye will naturally heat up as soon as it hits liquid and it can heat up so fast that if your milk is all liquid it can cause it to burn and turn a funny orange color so I hear.
 3. Weigh your lye and carefully add it to the milk. Lye is a dangerous substance so I did choose to do all the working with lye outside (there are some fumes) and I wore long sleeves, pants, gloves and goggles just to be cautious. Lye can truly burn. I guess vinegar can neutralize the burn so just in case I also kept some vinegar handy.
 4. Stir the lye and the milk carefully together. It will heat up naturally.

5.  When the lye mixture is warm (feel the outside of the pan or use a thermometer that is just for this) and a similar temperature as the fat/oil then add the oil to the lye and milk. Stir while combining if possible.

 5. Add the borax.

 6. Stir, stir, stir (for probably 15-30 minutes) until your soap traces. Trace is when you soap thickens and I believe the saponification is happening at this time too. A bunch of chemical stuff that I don't truly understand. If you make gravy or pudding then I think the trace won't be that hard for you to figure out either.

7. At trace is when  you start adding additional ingredients like oatmeal (which is good for your skin), peppermint (I love the smell of it and thought it looked kind of cool - but it didn't add as much scent as I had hoped.), and any essential oil. With my batch I did add around 10 drops of peppermint oil along with the dried peppermint but it didn't nearly have the peppermint scent that I had hoped for. A soap making friend told me later that when you add essential oils you need to add tablespoonsful not just drops if you really want to smell it. I don't know if I will ever do that or not as essential oils are expensive. The soap does smell nice anyway- I think everything combined made a nice smell just not a strong peppermint one.

 8. The next step is putting the soap into "molds". In researching I found that many things could be used as molds - there is really no need (at least from a practical standpoint) of buying or making expensive molds. We used all sorts of plastic containers. When it was in something like the dish soap bottle above I did have to cut the whole bottle (making it useless for being a mold another time) in order to get the soap out but that didn't bother me as it was "trash" anyway.

9. Put all your molds in a rather insulated spot where they will stay warm and not harden to fast. I put all my molds in a cardboard box, wrapped in a towel out on our hot deck.

10. Check them every so often to see when you will need to cut them. My friend was able to wait until 48 hours later to cut them. We ended up cutting them only 8 or so hours later as they were already hard. There is a danger of them getting to hard and being very hard to cut. Because of our variety of "molds" we ended up with soap in all shapes and sizes. We even dedicated a few old candy molds to soap making so we ended up with some pretty little sunflower soaps too.  When cutting the soap I would advise wearing gloves. I didn't and it wasn't any big deal but the girls who were helping unmold the soap too found that their hands felt a little irritated. This batch made around 30 bars of regular size and 8 small bars.

11. Let the soap ripen for 3 weeks or more in a moderately cool, dry and airy place.

I have now been using our soap for around a week and I like it quite well. We are using it in the shower/bath and I have also started using it for my dish soap. I hadn't thought of doing that before until I was reading in Carla Emery's book (The Encyclopedia of Country Living) and she mentioned that she used bar soap for dishes and then I realized that my friend who makes soap only had that available for dishes (at least that I could see) at her house too. Lye soap is supposed to cut grease well.
I am rather excited to be able to make not only my own soap for cleaning us but also for cleaning our dishes. I can cross 2 items off of my buying list! At this point the only thing I bought for soap making is lye and then the oatmeal (but we already have that on hand for eating) but I have been reading up on making lye (from ashes) so that is something I plan on trying sometime.

 DISCLAIMER - this post contains information on how I made soap but I want to make sure you know that I am no authority on the subject. This was the first time I made it all by myself. Lye is a dangerous chemical and it does need to be treated with respect. If you want to make soap please do quite a bit of research and familiarize yourself with the process and the risks involved. If you make soap using these instructions you do it at your own risk.

SOAP GIVEAWAY!


Would you like to try some of our homemade back the basics soap? I have decided to host a giveaway of one bar of our soap.

   If you would like to win.....

1. Leave a relevant comment on this post telling me why you would like to win this giveaway or tell me some soap making tip or story. Please be sure to leave your e-mail so that I can contact you if you should win.

2. If you would like a second chance at winning then please become a follower of my blog via Google Friend Connect or subscribe by e-mail and then leave another comment telling me that you did that.

This giveaway will go through September 29th. I will e-mail the winner at that time to get their mailing information.

AND THE WINNER IS: KIMBERLY IN NC - if you haven't heard from me yet please e-mail me with your mailing information.

Thanks!

Don't miss my other giveaway going on right now: "One Thousand Gifts" book.

I am linking this to:

monday's homestead barn hop

and the Chicken Chick's Blog Hop


Sunday, September 22, 2013

Giving Thanks for God's Gifts {One Thousand Gifts review and giveaway too!}


"Giving thanks always and for everything to God the Father in the name of our Lord Jesus Christ" Ephesians 5:20

"Give thanks in all circumstances; for this is the will of God in Christ Jesus for you." 1 Thessalonians 5:18

Is that your life, saying "Thank you"? Do you really give thinks for everything? Do you truly do it in every circumstance?

   I have long thought being thankful was a very important part of my life. I have for quite a lot of years kept a prayer journal and in that journal I start out my prayer time with praise of God followed directly by a list of things that I am thankful for. So yes I am thankful, but I still have a long ways to go to get to the point of naturally thanking God for everything and in every single circumstance. Well, the more I practice at it the better I will learn to be!


  Several years ago I heard about a blogger name Ann Voskamp and became acquainted with her blog: A Holy Experience.  I read her blog, enjoying her gorgeous pictures and words and her gift for making you think and her focus on Thankfulness and Joy. I enjoyed joining at times her blog party where you post a list of the things you are giving thanks for in an effort to count 1,000 gifts.

   I had heard of Ann's book "One Thousand Gifts ~ A dare to live fully right where you are" and have wanted to read it and so I was delighted when I was contacted recently wondering if I would like to review it (and host a giveaway of it!). I said "Yes, Yes, Yes!".

  The book did not disappoint me. Ann has a wonderful writing style and a wonderful message. She shares the story of a trouble childhood and struggles even in adulthood and the healing that comes when you learn to thank God even in the midst of troubles.

  She shares how gratitude can help us to have right priorities/focus in our life. She shares how important it is if we want true communion with God to give thanks for what He has given us. She writes about this in a way that I have not heard before but that makes perfect sense.

   She talks about the importance of trusting God (I mentioned how much the book encouraged me in this area here). When we are truly thankful for all that He has given and when we realize that all good gifts come from Him and that He knows our every need then we really don't need to worry any more.

  I really, really enjoyed this book and am looking forward to reading it all over again! I highly recommend it to you if you would like to live life more fully!

  Would you like to try winning this book?

I am blessed to be able to host a giveaway - If you wouldn't like to enter please:

1. Leave a comment telling my 3 things you are feeling thankful for today. Please leave your e-mail address in your comment so that I can contact you if you should win.

2. If you would like a second entry please become a follower of my blog via google friend connect or subscribe to get my blog posts delivered to your e-mail. Then leave me another comment telling me how you follow my blog.

This giveaway will go through September 29th. Stay tuned - I have other giveaways lined up for this week as well. It should be fun!!

  Disclaimer: I was given this book for purposes of reviewing but all thoughts are my own.

AND THE WINNER IS: THE TRIPLETTS

Saturday, September 21, 2013

What's Cooking?

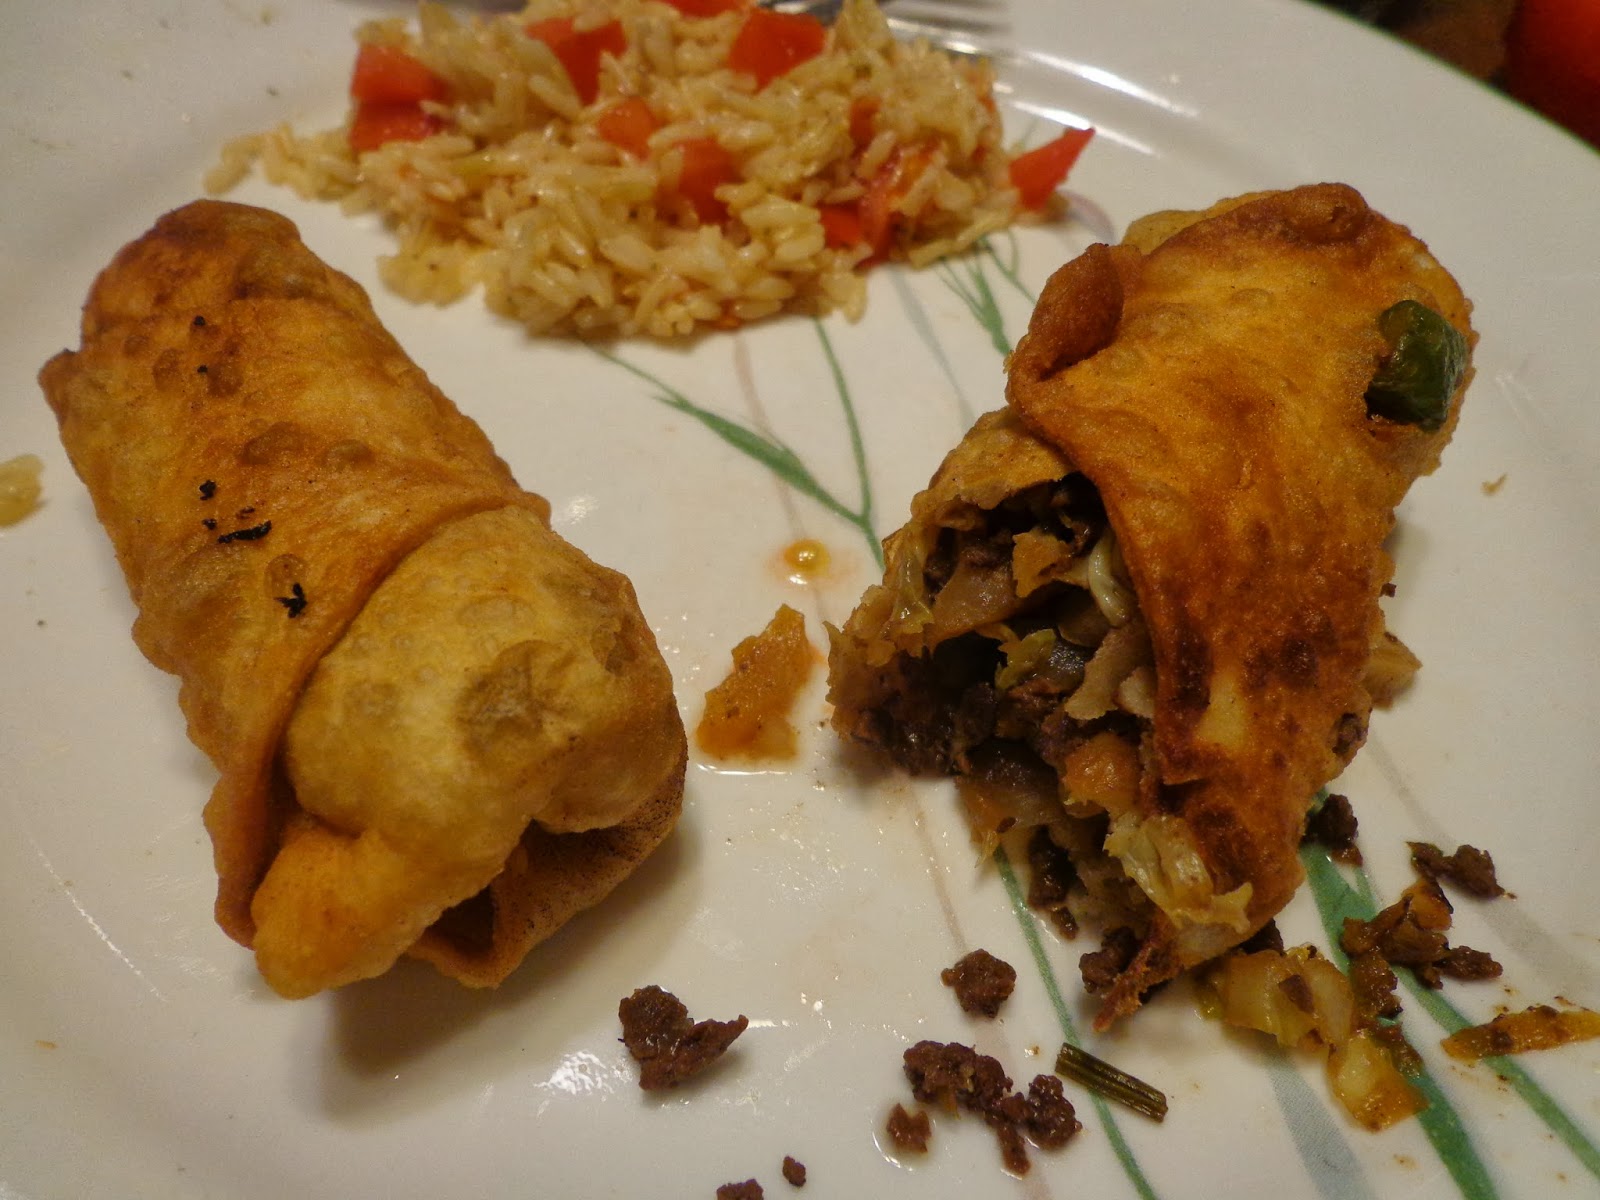
Homemade Egg Rolls
 Do you find yourself spending a lot more time in the kitchen in the fall? I do. First because I am putting up all the bounty from the garden and also because the heat of summer is over and I don't mind having the oven heat up the house a little and also because this fall weather just makes us hungry.

  I just uploaded my pictures from this week and noticed a lot of food photos so I thought I would tell a little bit about what has been going on in our kitchen.

 With plenty of cabbage available (my parent's have huge cabbages and we have a few that have done well too) egg rolls sounded like a fun meal. This isn't something we make often since it is deep fried but it is something that is enjoyed -especially by Mara and I. We make our own wrappers (it is super easy!) and then for the filling I try to use whatever garden produce we have on hand. Into these went cabbage, onion, garlic, ginger, green beans cut small and grated carrot for veggies. Both the beans and carrot were from our garden and the cabbage was from my parents.

   What I actually found the most exciting about these egg rolls is the meat. I had asked for the beef heart too along with the rest of our beef when we got it and then I had no idea what to do with it. A friend suggested that it worked well in stir-fry so I shaved some off one day for that but I still had a lot left so I decided to use it in the egg rolls as well. I cut it up in chunks and then ran in through my food processor so it was ground up. It worked wonderfully in the egg rolls. My family had no idea that it was heart (after eating tongue Ken informed me that he would really rather not know when something weird like heart or tongue is being served). Also this week I used up the last of the heart in another hot dish and again the family enjoyed it.  To complete the using what we have to make these egg rolls - I fried them in tallow which really worked quite well.
 Another kitchen experiment this week was to make dill green bean pickles. I found this recipe. I am looking forward to trying them out but I need to let them sit for 3 weeks or so first. Have you ever had dill green bean pickles? Are they any good? The reason I decided to make them is because my parents have had an abundance of green beans and I already have a years supply of the regular green beans put up so I decided it was time for some variety.
 Today I have had spaghetti sauce simmering in my crockpot. I am trying out this recipe (with my own little adjustments of course!).
 Vinegar making was one of the things that I got down today. Not that the vinegar is done but at least it is started now. I am making apple scrap vinegar and also I am trying to use some strawberry jam that fermented to make vinegar as well. I was excited to find a good use for my lovely pottery pitcher that had lost it's handle.
 And this didn't need any cooking but we sure enjoyed eating it! Lovely, ripe watermelon from our garden! Some years we don't get any melons that ripen and then sometimes we pick them at the wrong time (we already ate one that really wasn't very ripe this summer), but this one was perfect! I tasted so good!

What is cooking in your kitchen?

Thursday, September 19, 2013

American Phoenix by Jane Hampton Cook {A review}


This summer I enjoyed reading American Phoenix by Jane Hampton Cook. It is about John Quincy and Louisa Adams, the War of 1812, and the exile that saved American Independence. With the book being over 500 pages and being somewhat deep reading and since I tend to read quite a few books at once, it did indeed take me most of the Summer to get it read but I truly enjoyed the read.

   I have long had an interest in the Adams family. Mostly because I shared a name with Abigail Adams - John Quincy's mother. So when I was young I was given a book about her and have read whatever I can find about her since that time. A few years ago we were given another hugely thick book about John Adams and I enjoyed that as well so I was happy to have the opportunity to learn more about John Quincy and his wife Louisa.

   I knew John Quincy had quite the resume from being secretary for his father when John Adams was a minister to other counties, and then going on to representing the United States in foreign countries on his own, then being a Senator, President and a Member of the House of Representatives (the only President to do that after being president) but I didn't know much about the man other than some things I had heard about his study of the Bible and other books.

   This book had oodles of information that we very well researched and written out about their time in Russia and his large influence on ending the War of 1812. The Author was able to write in such a way that would make me put myself in his or Louisa's shoes and think what things would have really been like. I suppose it helped that I am involved in politics and that after visiting with congressmen and those that have run for a seat I had already thought about how much politicians sacrifice in order to serve their country (One that I visited with was able to spend time with his family every other weekend - I would really not like that!). However what current politicians sacrifice is pretty much nothing compared to what people like John Quincy went through. He decided to leave their older children in America while they went to Russia so that they would have good schooling (against Louisa's wishes) hoping that he would be home again in less than a year but it ended up that they didn't see their children again for years! (6, I believe). I can only imagine how hard that would be. They also went over to Russia on their own money and weren't paid for months and months and meanwhile were face with a very expensive lifestyle expected of them in Russia.

   If you enjoy American history I think you would enjoy this book which peeks into a story that is not very well known.

Disclosure of Material Connection: I received this book free from the publisher through the BookSneeze.com® book review bloggers program. I was not required to write a positive review. The opinions I have expressed are my own. I am disclosing this in accordance with the Federal Trade Commission’s 16 CFR, Part 255  

Wednesday, September 18, 2013

Sharing your husbands dreams

Last week I wrote about learning to trust both my husband and God concerning the idea of moving. Trusting has been going well and so this week I have been thinking about how much better it is when I share my husbands dreams. There are many dreams that we do share in life but there have also been some we didn't share.

  One of those was the dream of living on the shore of a river or lake (not my dream because it would require moving - not because I am opposed to water) and another dream of Ken's that I can think of at the moment that I don't share is the dream of wanting to own a convertible and drive around in it when we get older (like when the kids have left home).

  As I have been thinking and praying about the moving situation I have been trying to share Ken's dream in that and it is actually rather happening. I am starting to see all the fun things there would be about living near water, the benefits there could be in a new home (especially if we end up designing and building) and so forth. I am actually starting to feel excited about it. Now I won't be unhappy if it doesn't work out and we stay here instead but for now I am having fun dreaming with Ken about houses and property and such like.

  I don't know about you but with me when there is something Ken wanted that I felt would negatively affect me I would tend to hope and probably sometimes even pray that it wouldn't work out. Instead of working to change my attitude about it I would hope that he would change his. Thankfully that hasn't been a lot of things in our life together but there have unfortunately been a few. I am hoping that since I have started to realize what I was doing that I will be able to make a change with the help of the Holy Spirit and not act like that anymore.

   Now concerning Ken's dream of a convertible....
I don't think I am to the point of dreaming about that yet but I have started to realize that some of the reasons I didn't want one were rather lame and really didn't matter that much.

  Do these thoughts make sense to you? Can you relate or share tips on this subject?

Sunday, September 15, 2013

Harvest Time {Thought and tips on putting up food for winter}

 This last month has been pretty heavily focused on getting food put up for the winter. I really enjoy the lifestyle that we live where we raise and process our own food as much as we can. I know that is not something everybody wants to do but for others that are interested in this lifestyle I thought I would share a little about how we do that frugally and while running businesses, homeschooling children and many other distractions.

Why do we put up food?

There is plenty of food available at grocery stores, why do we want to put up our own instead?

  • We can have healthier foods. I try to make sure that the foods that I put up are basically organic and gmo free.
  • We save money.
  • We always have a good supply of food on hand which prepares us for emergencies.
  • We enjoy being able to know very well all about our food. I am not sure how to describe it but when we can raise and make our own food and other things then life feels more connected to me.

Canning fish this year for the first time.
 Where can you get the food to put up?

  • Your own garden. This is probably most people's first thought and it is a great one but it is not the only way to put up good food for winter.
  • Picking wild foods on public land. This is how we get our blueberries and juneberries and things like that.
  • The generosity of other gardeners. Gardeners are often generous people especially when they know that you will use it and not waste it. When someone offers us produce I usually say "Yes, Thank you!". My parents tend to give us a lot of stuff as they have been able to grow it well and know we appreciate it, other friends have also given us some of the abundance of their gardens at different times. When this sort of thing happens my goal is to always show my thankfulness, to offer to help pick or help in other ways if possible and to be sure to offer to share when I have abundance as well.
  • Gleaning. We get our potatoes every year by going to fields that grow potatoes after they harvest and then looking for the rejected potatoes in the field. I am sure there are many ways you can glean. Just be sure to check with those who own the place to be sure that it is okay.
  • Picking at a U-pick farm. This is how we generally get our strawberries but we also got a bit of corn that way this year as well. It depends on the area you live in what is available and whether or not it is good prices.
  • The farmers market. I have not actually ever bought stuff from the farmers market for purposes of putting up as it has seemed to expensive and we grow our own garden but I know some people do. A friend of mine who lives in a bigger city has gone just as they were about to close up for the day and gotten some pretty good deals on large quantities of veggies.
  • Ordering from Azure Standard or buying lugs of fruit from other sources. When you buy large quantities in season on things like fruit often you can get some pretty good deals. I have pretty much never done this as we have usually had plenty of our own but I know friends that do this.
  • Raising your own animals for meat, eggs and dairy products.
  • Hunting and fishing.
  • Buying from a local farmer.
  • Keeping your eyes and ears open for times when people want to get rid of animals that could be butchered. I know I have seen ducks and roosters available for give-away before, my parents are regularly given fish and my dad has also butchered a pot-belly pig when it's owner grew tired of it.
  • Raise bees.
Part of what Mara picked one day at my parents. She picked for both them and us.
 What methods can be used for preserving food?

  • Water bath and pressure canning.
  • Drying.
  • Freezing.
  • Smoking.
  • Fermenting.
  • Cold Storage.
Pesto making.
 How can I do these things without spending a lot of money?
  • Realize that you don't need to buy a lot of fancy equipment.
  • Buy used equipment such as canners, canning jars, etc.
  • Buy Tattler canning lids that can be reused year after year.
  • For drying herbs just tie bunches together and hang them upside down until they are dry.
  • Save bags and containers all year long (cottage cheese containers, peanut butter jars, bread bags, etc.) to use for freezing stuff in and storing honey in. I also use repurposed containers to store my dried herbs in. If you don't get enough of your own containers I have found that friends (who do buy more processed stuff) are usually quite happy to save them for you especially when you share a jar of honey now and then! :-) When we are butchering and packaging meat we will often use a grocery bag for the second layer of wrapping. Many people (though not me as we use cloth grocery bags) have an over abundance of these.
  • For cold storage if you have an empty room in your house simply shut off the heat, keep the door closed and use it to store things like squashes, cabbages and so forth. We have never really had that available but my parents do that all the time.
  • Figure out how to make needing equipment or make do. With honey extracting I was very blessed to have my dad and brother make me an extractor instead of having to pay hundreds of dollars to buy one. Instead of a heated honey knife I have made do with knives and a hot plate. Instead of buying a cheese press I intend to make one using things that we have.
Canning at our homemakers group.
 Putting up food for the winter can be a LOT of work, especially in the fall but I think it is worth it. Having all the food put up sure makes shopping and cooking a lot easier for the rest of the year. Also the satisfaction that it brings is very, very fun to me. My family is learning to really enjoy it as well.
A honey harvest.
Are you in the midst of harvest and putting up too? What tips do you have to share on this topic? I would love to hear your thoughts or questions!

LinkWithin

Blog Widget by LinkWithin